There are many reasons why you might want to paint your motorcycle helmet. If you’re looking for a way to make your helmet stand out, or if you want to give it an updated look, then painting is the perfect solution. Maybe you want to change the color scheme, or maybe you want to add a design or logo. Whatever the reason, painting a motorcycle helmet is a relatively simple process.
Follow these step-by-step instructions and get ready to paint like a pro in no time!
Decide What Type of Finish You Want
Before you start painting your helmet, you need to decide what kind of finish you want. There are three basic kinds of motorcycle helmet paint finishes: matte, semi-gloss, and high gloss. Matte finishes are the least shiny and are good for helmet designs that require a lot of contrast. Semi-gloss finishes are a bit shinier than matte finishes, and they’re good for helmets with simple designs. High gloss finishes are the shiniest and are best for logos or designs that use small shapes.
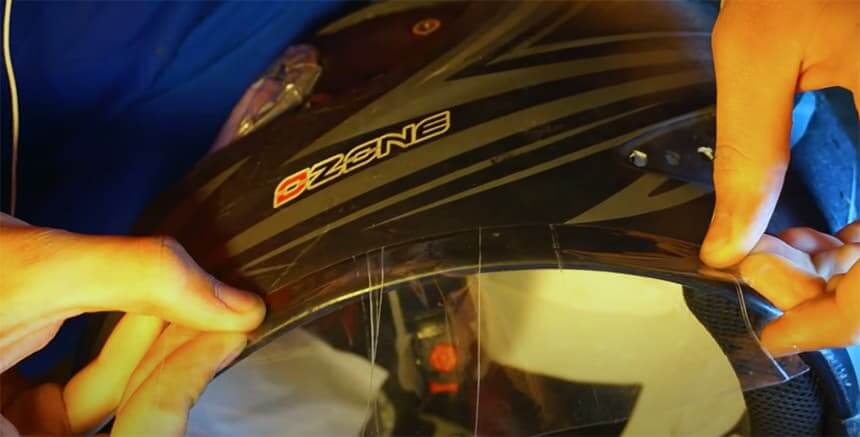
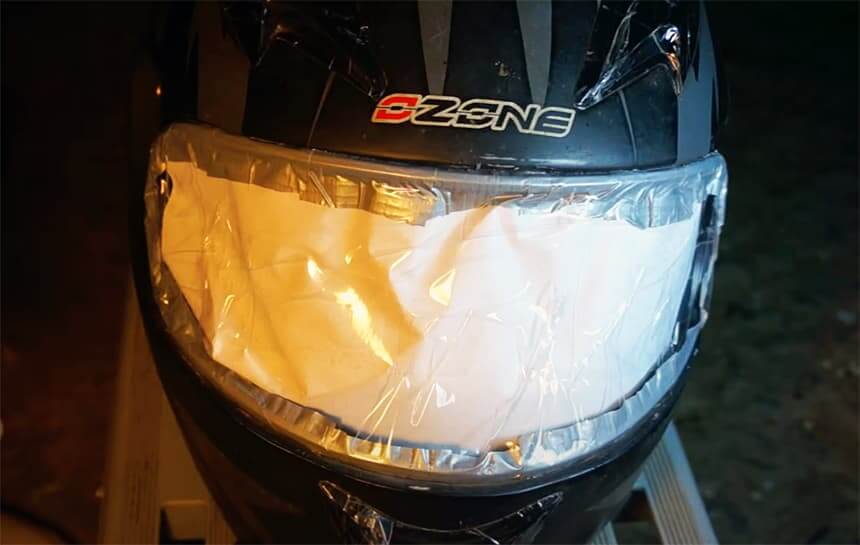
Remove parts
Remove all possible parts from the helmet: screws, visor, visor mounts, goggles, chin strap, visor, and all insides. Tape over the parts that cannot be removed and painted. You also need to tape up the visor hole, but here it is better to use mounting tape (better glued to the rubber lining) and then from the inside of the helmet glue to this tape a piece of A4 sheet the size of the visor.
Sand the Helmet
Now that you’ve decided on a finish and protected the parts of your helmet, sand your helmet with fine-grain sandpaper to rough up the surface of the helmet and to remove old paint. If your helmet has been used too long, the paint may be soft from old age, and then sandpaper is not likely to help. In that case, use a toothbrush and solvent to remove the paint. Using a circular motion, you should be able to remove the paint from the entire helmet in about 40-60 minutes.
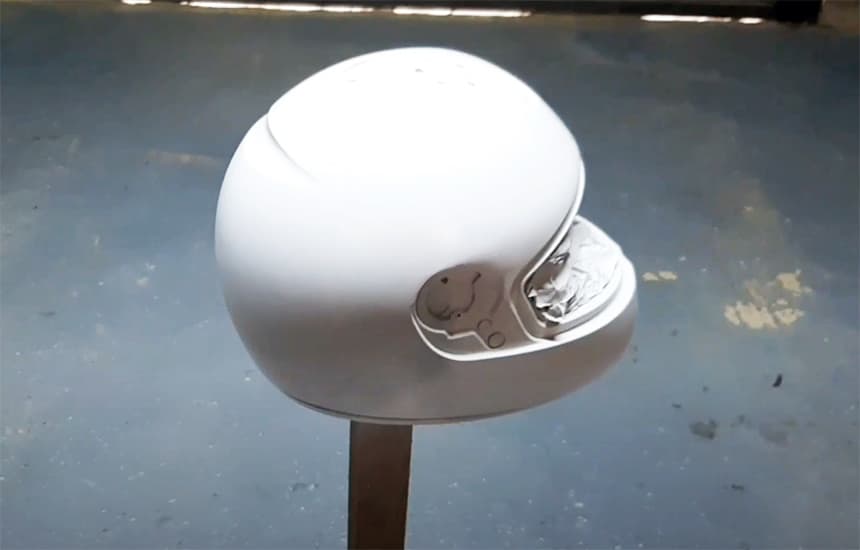
Primer
Apply primer to your Helmet for a solid foundation for painting. The primer will hide irregularities and scratches, level the surface of the helmet, and improve adhesion to the paint. After the primer dries, it is recommended to sand the helmet again.
You can choose from Krylon Fusion All-In-One Paint & Primer or Rust-Oleum Automotive Primer. Both primers come in a variety of colors and are paintable. Let the primer dry according to its instructions, then go on to the next step.
Paint Your Helmet
Once you’ve let the paint primer coat dry, it’s time to apply your chosen finish color. For the best results, spray the paint on in thin, even coats. Let each coat dry completely before applying the next one. To paint your helmet you will need 50-80 grams of car paint and the same amount of varnish.
It is recommended to use any alkyd or acrylic compositions for helmet restoration. The first type of paint is more reliable because it is resistant to temperature changes and various weather conditions (rain, snow, frost, etc.). A properly applied layer of alkyd compound will last several years without problems.
But acrylic products are suitable for those who like to change their image frequently. If you don’t like the way your motorcycle helmet is painted, you can easily remove the coating and apply a new layer of composition.
Use painter’s tape to form the curves and straight lines, especially if you want to use more than one color or make a pattern on the helmet. Or you can buy special stickers and decorate your helmet that way.
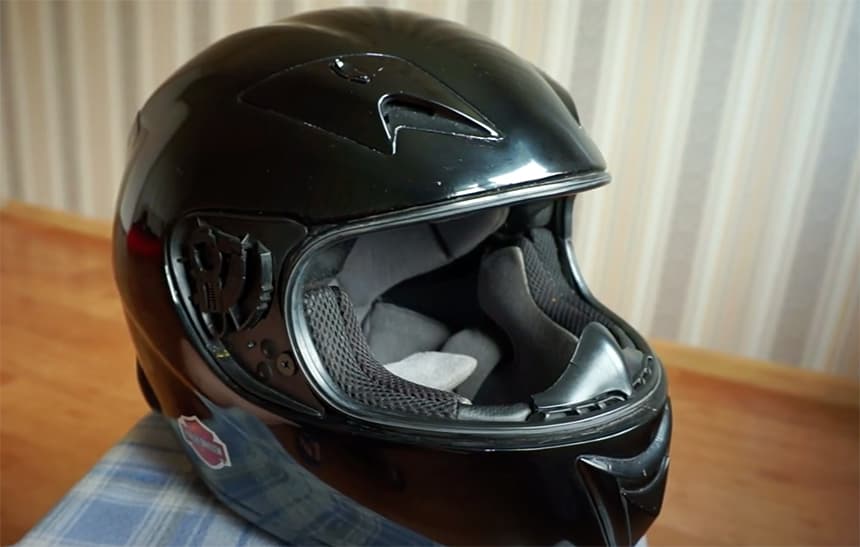
Apply a Clearcoat
Once you’ve finished painting your helmet, apply a clearcoat over the top to protect the paint from scratches and chips and give it a nice shine. You can also use Rust-Oleum Clearсoat or any other coat you buy. It comes in a variety of colors, so choose whichever one matches best with your paint job.
Attach the Visor and Chin Strap
Once you’ve painted your motorcycle helmet, all that’s left to do is attach the visor, chin strap and other parts.
Check out a Video Guide on How to Paint a Motorcycle Helmet.
Final Words
Painting your helmet is an easy process that can be completed in one afternoon. By following these simple steps, you can create a finished product that will protect your head and make you stand out from the crowd. Remember to use a clearcoat to protect your paint job, and be sure to attach the visor and chin strap before you hit the road. Enjoy your new helmet!
Thank you for reading our article on how to paint a motorcycle helmet. We hope you found it helpful and informative.
Happy painting!